In Lesson 6, we assembled the shot; now we are building the sequence. The camera, layout, animation, crowd, and explosion are handled by different departments in their respective scenes, and each one writes their own layer. Finally, we will assemble the shot into a single file and integrate the new animation version.
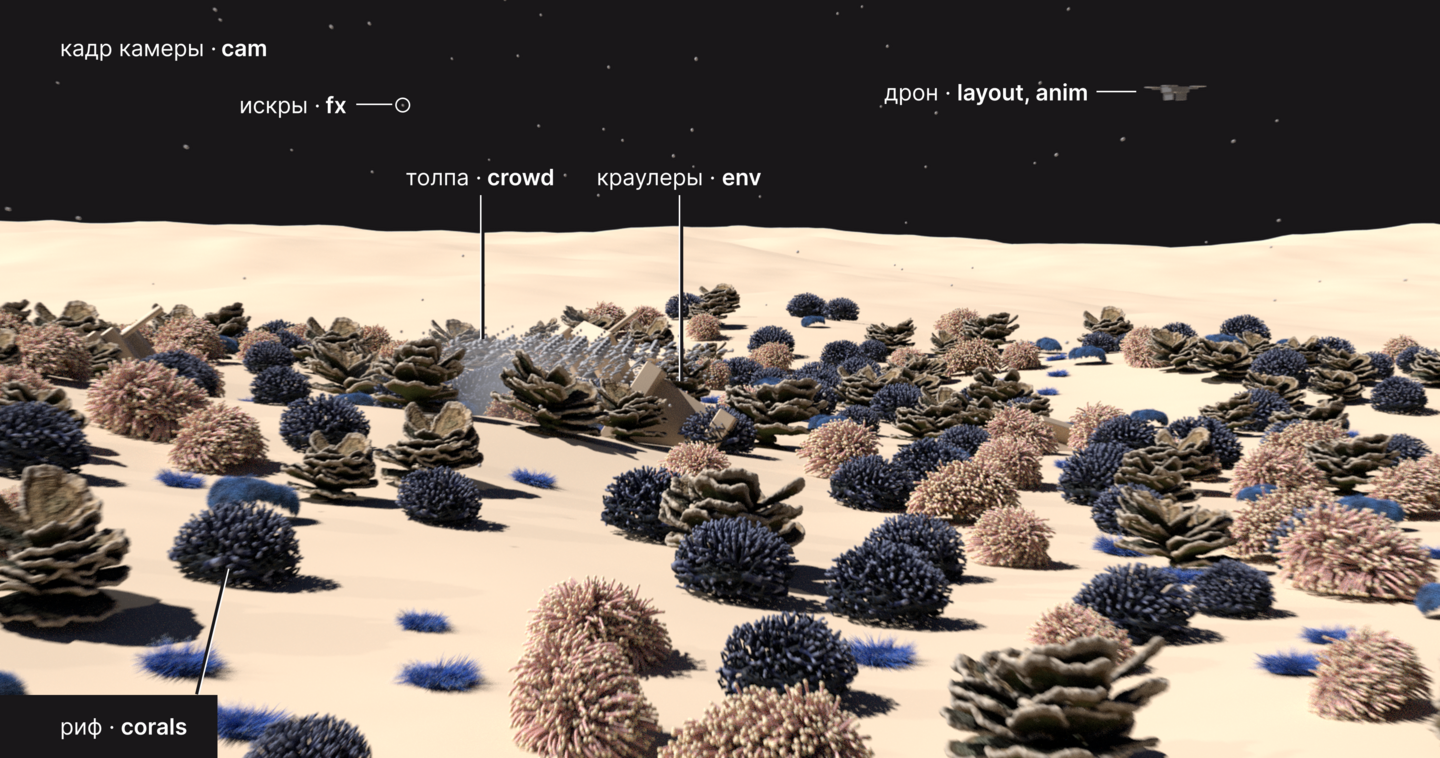
Shot is a short file containing a layer list. A new version of any layer overwrites the shot with a single line.
1. Layered Shot
A shot is assembled into a single text file in the publish shot, as shown in the example sq010_sh0010.usda.
A shot file that does not have its own primitives, but includes the shot time and a list of layers, is called the shot root.
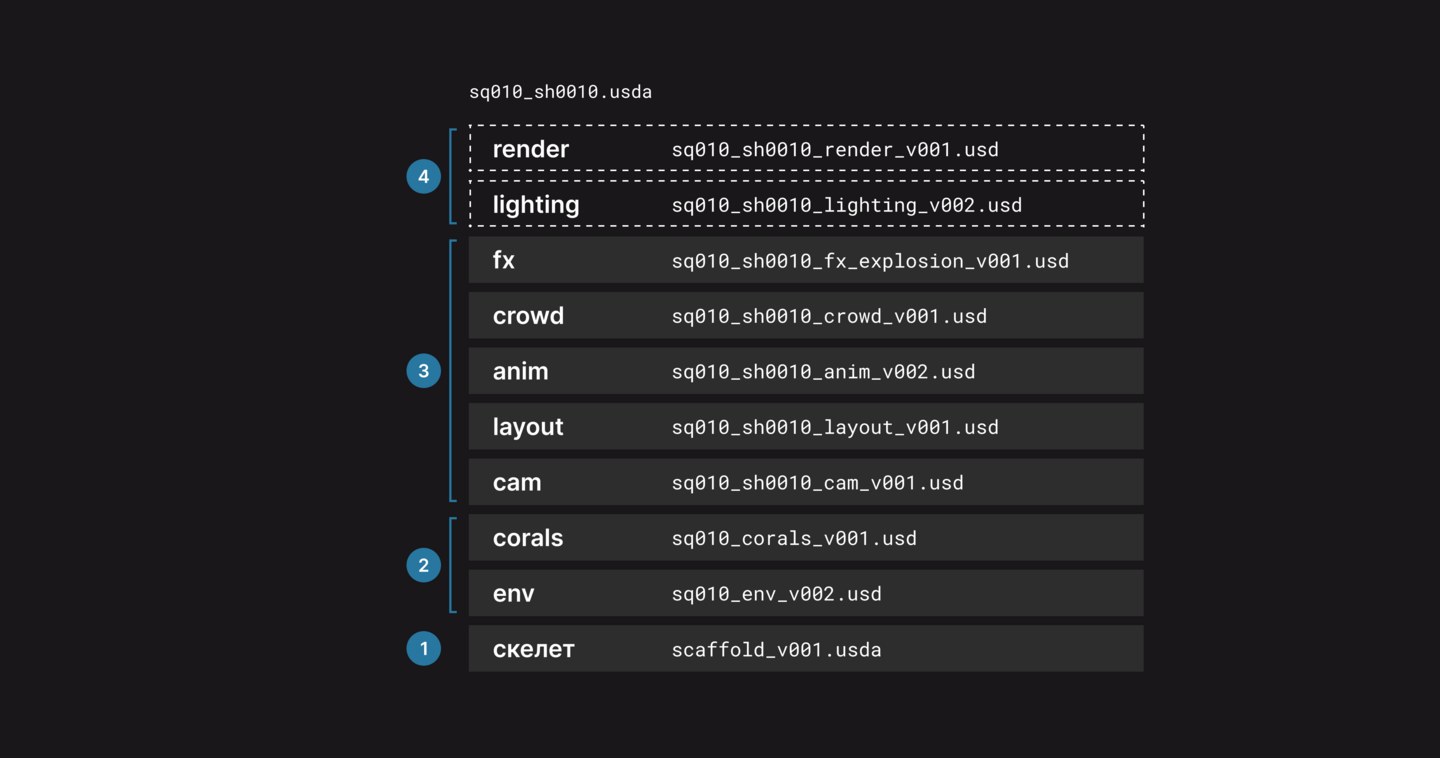
The top line is the strongest in the root.
1. At the bottom is the skeleton from Lesson 3.
2. Above it are the environment and the riff sequence from the _seq folder.
3. Higher up are the layers of the shot departments.
4. We will add light and rendering in Lesson 8.
2. Camera, Layout, Animation
The department scenes are located in the activities shot and are structured identically—we will show it on the camera.
1. The SubLayer connects the skeleton, environment, and rig; the following departments still retain the previous layers.
2. The Layer Break separates all of this from the department layer.
3. Next are the department’s own nodes; this is the Camera for the camera setup.
4. The USD ROP writes the layer to the publish shot.
The camera sets the shot camera; USD ROP records it frame by frame.
1. In Primitive Path, enter /World/cameras/shotcam.
2. In Translate keys, the fields are green.
3. Set Valid Frame Range to Render Specific Frame Range with the shot frames; otherwise, only one frame will be recorded.
4. Output File points to publish/usd/cam/v001.
Attribute values recorded per frame are called time samples, which is how the animation is stored in the layer.
The layout places the drone. The Reference pulls it from the published asset, and Transform positions it.
1. In Primitive Path, type /World/vehicles/Drone_001.
2. In File Pattern, the drone file is set to Reference Primitive by default.
3. In Translate, set the drone’s location without any keys.
4. We leave the Valid Frame Range untouched. The drone is static; one frame is sufficient for it.
The animator operates on top of the layout; the layout and camera layers are located in the SubLayer of its scene.
1. Transform takes the same primitive as the layout.
2. Keys are set in Translate and Rotate.
3. USD ROP writes the shot frames to anim/v001. This includes the drone’s position and orientation for every frame.
A question to ponder. Layout has released a new version and repositioned the drone. Where will the drone be in the shot?
3. FX in One Layer
The explosion is calculated in the SOP for that same scene. The volume is stored in VDB files; the smoke and spark shells are spread across frames, and the FX layer only contains paths to these files.
Animation that is broken down into frame-specific files is called value clips. USD reads only the file for the specific frame.
The FX network is assembled in /stage.
1. Primitive creates the root /World/fx/explosion, a kind component.
2. Volume sets the volume, and Configure Primitive gives the branch the render purpose render.
3. The shell is provided by SOP Import, Configure Primitive with purpose proxy, and Geometry Clip Sequence.
4. The sparks have their own pair of SOP Import and Geometry Clip Sequence.
5. Merge collects the branches, and USD ROP writes the layer.
The Volume sets the explosion volume.
1. In Primitive Path, type /World/fx/explosion/geo/render/volume.
2. For Primitive Type, set the Scope, geo, and render to folders only.
3. In File Path, the path to the VDB files, and $F4 provides a file for each frame.
The volume primitive is named Volume. It contains the fields density, flame, temperature, and vel, and in their attribute, filePath points to the VDB for its respective frame.
The frame wrapper is arranged by Geometry Clip Sequence.
1. The first input is empty; the wrapper arrives in the second, otherwise, its frames will fall into the layer itself.
2. We enable Get Geometry From Second Input and Flatten Clip Files, and the geometry itself is written to the frame file.
3. Save Clip File Path leads to proxy/clip, where the manifest and topology will be placed next to it.
The FX layer contains no voxels and no points. It only has paths, and the frames are laid out side-by-side.
USD ROP writes the FX layer frame-by-frame, matching the camera settings.
1. The Output File is directed to fx/explosion/v001, next to the vdb, proxy, and sparks folders.
2. Turn on Flush Data After Each Frame so that every frame is immediately written to disk instead of accumulating in our expensive RAM.
4. Let’s gather a shot